Pair Mode is indicated by the top LED flashing from red to purple, and the port that is being paired will be slowly flashing.
When the GameCube is first powered on BlueRetro is automatically in pair mode
Upon a successful pair the port LEDs will go solid.
After a few minuets the pairing state ends. To reenable pairing mode later hold the reset button for 6-9 seconds, the front LEDs will be flashing fast.
The reset button on the console has been converted to offer new functionality based on how long you hold the button down. While it is being pressed the front ports will light up to show which state you will be enabling.
Holding for 0-3 seconds will perform the same action as on a stock console, reset.
In this state all four front port LEDs will be solid on
Holding for 4-6 seconds will disconnect all connected Bluetooth controllers
In this state all four front port LEDs will be slowly blinking
Holding for 7-9 seconds will enable pairing mode
In this state all four front port LEDs will be blinking faster
Holding for 10 seconds or more will factory reset to the original firmware and remove any custom configs
In this state all four front port LEDs will be blinking rapidly
When the system is placed in power down mode the reset button will wake it with a single press.
If you power the system off with the main power button, and hold reset while powering on the BlueRetro adapter will be in sleep mode and will not interfere with the console use this in the event that a peripheral is not working nicely with BlueRetro
Macros are shortcuts that can be used to perform actions for Blue Retro. The terminology below would map to a PS4 controller as Main triggers L2/R2 Middle Left Option
Disconnect controller (+ power off internal mod): Main Left Trigger + Main Right Trigger + Middle Left (Start) + Face Down
System reset: Main Left Trigger + Main Right Trigger + Middle Left (Start) + Face Left
Toogle Pairing mode on/off : Main Left Trigger + Main Right Trigger + Middle Left (Start) + Face Right
Factory Reset: Main Left Trigger + Main Right Trigger + Middle Left (Start) + Face Up + D-pad Up
Deep Sleep: Main Left Trigger + Main Right Trigger + Middle Left (Start) + Face Up + D-pad Down
The web interface is a powerful tool that enables the user to customize their experience and upgrade firmware as new updates come out. This interface requires a phone or computer with chrome and Bluetooth to initiate a connection.
The process goes as follows
Visit https://blueretro.io/ on google chrome on a computer or android phone to connect to the BlueRetro Receiver.
Click the link to the action you wish to perform
Click the pair BlueRetro option at the top
Disconnect all controllers from the console (Hold the reset button for 4-6s slow blinking LEDs)
The device should show up in the list and select BlueRetro
After install the blue led flashes once and goes off and the system will not power up:
Wait for the Blue LED to stop blinking, then press the Reset button until the red LED comes on. This is caused by jostling in shipping or the system being turned off by the controller macro.
If you run into other issues please reach out via the contact page
More information can be found on the Github for Blue Retro
Use the following link to see the currently tracked issues with Blue Retro.
https://github.com/darthcloud/BlueRetro/issues
Notable issues for the GameCube
Switch controllers have stability issues when more than one Switch controller is currently in use. This affects all controllers that use the Switch interface, PowerA, Hori, Official, and other 3rd Party. There is not a current ETA on this being fixed. The underlying problem has not been identified.
Exlene GameCube style controllers do not currently have rumble support.
This controller is officially supported in firmware 1.8.2 should be paired in IOS mode.
]]>
Full video guide can be found here: https://youtu.be/Eei9UhATfdU
We also have this guide to better show the wiring https://youtu.be/lAUkWpU9gKE
The first step is to remove the 4 bottom screws. These are a special type of screw that requires a Gamebit screwdriver in the 4.5mm size you can find them from many sources, but here is one on Amazon for convenience
Once the screws are removed pull the top shell off the console
(note this shows components that may not be installed in your unit.)
Now remove the front board and plate. This is done by gently tilting the front board forward. the clips on the sides may need to be slightly pulled apart to get it to release. Once the front section is loose you will need to pull the FFC cable (white flat cable that is attached to the front board.
The next step is to remove the two screws from the front board. (Pictured is the new board but the process is the same) Once removed pull the old front PCB off the front plastic.
The next step is to install the antenna onto the front plastic. The antenna just needs to be able to reach the antenna socket on the new board. I recommend that it should go above the center two ports, but can realistically go anywhere above the memory card openings.
Next install the new front board onto the front panel. Then connect the antenna:
Just make sure the antenna is pressed down firmly, it will take a bit of force to connect.
Now reinstall the retention screws, and your new front board should look like this:
Plug the flat flex cable (FFC) into the connector on the GameCube main board. (it may need some force to press in. Seat it as far as you are able, the blue should be facing towards the front of the console.
Reattach the front back into the console. The bottom edge gets set in first, and it tilts up to snap into place.
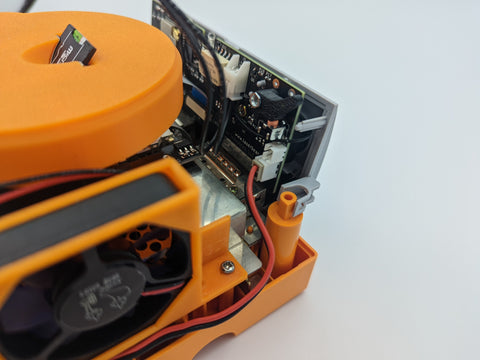
Now unplug the GameCube power lead from the power switch board. It has the thicker wires on it. You may also unplug the fan wire from its header.
Plug in the included wire harness into the now open power port
Plug the GameCube Wire into the larger open header on the new front board, and the fan into the smaller header.
Carefully place the top shell back onto the system, watch for the wires as you close it up, they sometime pop out, use a small flat object to keep them out of the way if needed. In the photo you can see there are two plastic parts that stick out, make sure the wire sits comfortably above these and as far back as possible otherwise the lip on the top shell will catch on the wire.
Reinstall the bottom screws.
Power on your system, if it does not power on hit the reset button, sometimes the relay on board will get flipped in shipping causing it to be in the open state.
Once powered up the main LED should be purple indicating that you can pair a Bluetooth controller.
]]>